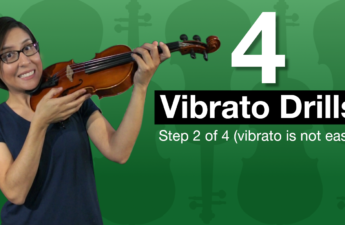
My third step for developing vibrato is not easy. This third step contains 3 different training drills that are designed to implement both the violin and bow. These exercises are a continuation of my step 2 exercises, designed to be implemented in order. From here, I will assume that you practiced the step two drills from my previous video for about a month or more. Now it is time to put it all together.
For all these exercises remember to do them with a time limit of about 15 minutes per session to prevent any type of injury. Pay attention to your body and make sure you consult a medical professional if you feel discomfort or pain when doing these drills.
Drill number 1: First Position Wee Yoos with Hard Support
This drill is very much the same as my Step 2 – Third Position Finger Roll drill. The only difference is that you will apply it to first position and will use a surface area to support your violin scroll. This is usually referred to as “hard support”. It is extremely important to find hard support for this exercise, that way you will learn how to relax your shoulders, arms and your left hand while vibrating in first position. I use my music stand as hard support by padding it with a cloth and in a sitting position. You can also practice while standing up by using a wall for support – just protect your violin scroll with a nicely padded cloth. I’ve also seen others use the surface of a bookcase while standing, or a couch while sitting. Be creative, any surface that will support the bottom of the violin but also serve as a stop will do.
In first position, rock all four fingers back and forth. If you’re doing wrist vibrato, start from your wrist. If you’re doing arm vibrato, start from your elbow. But keep in mind, that vibrato is basically created with the flexibility of all your joints, from your arm, elbow, wrist and finger joints. You will need a metronome for this exercise, and you will osculate your notes at three different beats: quarter, eighths, and sixteenth beats. Also, you will want to kill two stones with one bird by paying attention to your bowing during this drill. With your quarter notes, you will do a total of 8 counts. Start on a down bow and at the count of 4 you will be at the middle of your bow and at 8 you will be at the tip of your bow. Then it’s the same with your 8th notes, you will continue at an up bow for 8 beats, at 4 you will be in the middle and you will end at the frog on 8. And last for your 16th notes, downbow again, midbow at 4, and end at the tip at 8. Refer my video for an example.
Once you’re used to doing this drill at 70 BPM, you can speed it up by 2-4 beats at a time in order to keep progressing to a faster speed. At your fastest speed, always make sure that the back and forth movement is consistent and steady to the beat, If it’s not, then you need to work at a slower pace.
Also, there will be a few issues that you may encounter as you’re doing this drill. For me there were about two main issues that I can remember. Number one, my hand / arm and thumb start to feel a strain while doing this drill. The solution here is to stop and adjust when this starts to happen. Check that your left shoulder is down and relaxed. If you’re like me, you will start to feel a little strain with your thumb (could be because it naturally collapses at the joint). Even if this happens do your best to make the movement without straining your thumb. I do this by loosening the grip with every back and forth movement. Remember to let the hard support do it’s job. If your first finger knuckle joint collapses, then you need to slightly adjust your hand so that it gives enough space between the neck of your violin and your hand to free up for the vibrato movement. My second issue is my fourth finger. It tends to straighten and lock up when attempting this drill. My solution to that issue to bring the thumb a little more forward on the neck of the violin. I turn my hand a little closer to the neck as well and then I check that my wrist is straight and not bent back toward the scroll of the violin.
In order for these first position wee yoos to be effective in unlocking your vibrato, you will need to practice this consistently everyday for several weeks. Like everything else in violin learning, it will NOT happen over night, you need to be consistent and persistent and one day, Voilà, you will have yourself a vibrato.
Drill #2: Fast (Pulsing) Vibrato Drill
All you need for this drill is your violin and bow. You will start by vibrating once per bow stroke and increment one more vibrato motion with each bow stroke. I usually do this drill when I have very little practice time and I can’t do the first position wee yoos. It’s a great drill for developing a faster continuous vibrato motion.
Bonus Drill: First Position Pulses
First position pulses are meant to be practiced after you’re accustomed to the back and forth movement for vibrato. Now you level it up by turning your back and forth movement into a pulsing motion. This tip I got from a video by ASO Education (I’ll leave the link in the description box below). It’s a really good tip that changes your perspective on how to create a better vibrato. So lets implement this pulsing motion to the first position drills at a slow BPM. Lets start at 60 BPM. We will start with one pulse per beat, then we’ll double it, then triple, and then end in four pulses per beat. Refer to my example video to get a clear perspective on how to do this drill.
Well there you have it, with these three drills you will be on your way to step 4 which is application. I recommend to keep doing these drills for a minimum of 4-6 weeks before trying to apply your vibrato to your repertoire. Implement these rigorous drills into your everyday practice so that you will get closer to unlocking your vibrato. I will also be publishing vibrato practice sessions of the first position wee yoos for those who need a guide to follow along. So look out for that soon.
Check out the video where I show how to do all of the drills for Step 3